Notice: Undefined variable: page in /home/vrxdg1855sn3/public_html/wp-content/themes/72tree/content.php on line 15
Notice: Trying to get property 'ID' of non-object in /home/vrxdg1855sn3/public_html/wp-content/themes/72tree/content.php on line 15
7 Spring Tree Care Tips
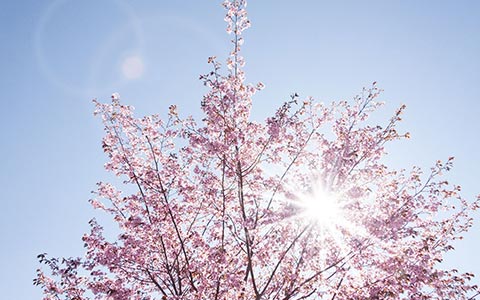
Prevent your trees from dying when they should be coming out of dormancy and thriving. Knowing how to care for your trees in the spring will keep them healthy and thriving.
72tree.com assembled the following tips to help you get your trees ready for the spring growing season.
1. Inspect Your Trees
The beginning of spring is the optimal time to inspect your trees. Your deciduous trees will sill be leafless, and your evergreens, well, should be green. During your inspection, look for the following:
• Cankers (dead sections of bark on branches or tree trunks)
• Oozing sap (trees eject sap to cover and protect wounds)
• Signs of infestation (adult beetle exit holes)
• Signs of disease (blackened and curled twigs)
• Structure (odd, crossed, or unwanted growth patterns)
• Prior pruning wounds (showing decay, fungal growth, excessive sap discharge)
• Suckers (these are offshoots from the trunk, branches, and roots that indicate stress and can be signs of a diseased tree)
Tip: Eliminate doubts and potential misdiagnoses by hiring an ISA certified arborist to check your trees, shrubs, and plants.
2. Prune Dead Wood
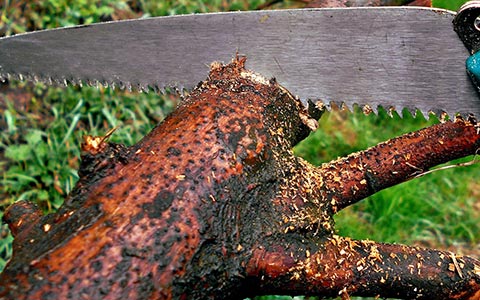
Winter is the best time to prune trees. However, the very beginning of spring offers you a visual indication of wood that needs to be removed. Consider the following:
• Prune out dead branches and twigs (use the “scratch test” green/moist beneath the bark – it’s alive. Brown/dry beneath the bark – prune it off.)
• Carefully prune diseased limbs or branches (look for cankers or discolored bark)
• Remove undesired growth (crossed branches and shape altering growth)
• Prune off and sprouting suckers (these anomalous growths take tremendous energy from the rest of the tree)
When your tree starts to leaf out or bloom, cease all pruning activity. The tree’s energy (stored water and nutrients) is being used for growth.
Note: Make your pruning cut 12-inches toward the trunk from where the limb’s diseased portion begins. If the disease is within 36-inches of the trunk, remove the entire limb.
Tip: Sanitize your pruning equipment (including your gloves) before and after working on a diseased tree.
Visit the link for further information and tree pruning techniques.
3. Provide Water for Your Trees
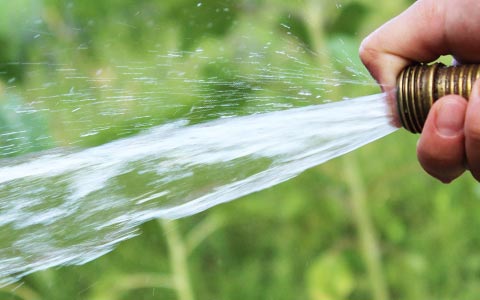
Out of everything a tree requires for healthy growth, water is the most important. Too little, and the tree will suffer hydraulic failure. Too much, and roots may become diseased, quickly killing the tree. Take the following into account:
• Soil around the tree should be well-drained (doesn’t pool up and stay)
• Soil should be consistently moist to the touch (not wet)
• Avoid all overhead watering or practices that splash water (splashing water is a primary vector for disease transmission)
• Water your tree 2 to 3 times per week
• Deep water your tree once weekly (let the water soak to a depth of 12 to 15-inches, this encourages roots to grow deep)
• Use soaker hoses or buckets to irrigate your trees (buckets with holes drilled in the bottom are great for deep waterings)
Tip: Increase watering frequency during times of drought and decrease it in unusually wet times.
4. Mulch Your Trees and Gardens
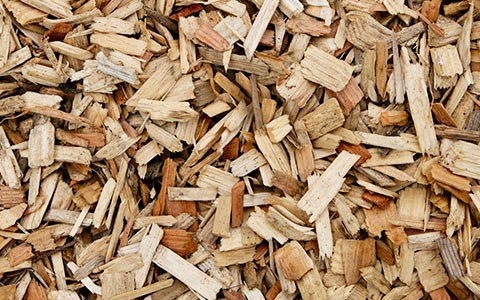
Applying organic mulch to your trees and garden helps regulate both soil temperature and moisture. Here’s how to do it right:
• Apply a 3 to 6-inch layer of mulch to the entire area within the dripline of your trees (needles, wood chips, or compost)
• Keep mulch pulled back 2 to 3-inches from the tree trunk (this avoids excess moisture and insect trouble around the root flare)
• When the mulch compresses, fluff it up and add more when needed
• Mulch your garden in the same manner
Mulch also serves as an “off-limits” zone to keep lawnmowers, wheelbarrows, and other equipment from encroaching on and damaging your trees.
Note: The drip line is the area beneath the branches, extending to the outer edge of the canopy.
Tip: Organic mulch naturally adds nutrients to your soil as it decomposes while increasing and protecting your soil’s biodiversity.
5. Fertilize Trees and Plants
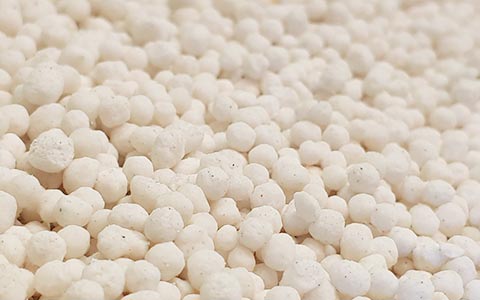
You may need to feed your trees. Before doing so, you should have your soil properly tested to measure its nutrient and mineral content, as well as its pH. You can send your soil sample to a university extension lab or a professional laboratory. Your soil test results should reveal:
• Cation Exchange Capacity or CEC (measures soil’s ability to retain elements and nutrients with positive charges or “cations”)
• Base Saturation (this is the distribution of cations in the soil)
• Nutrient and mineral levels and deficiencies
• Soil pH (most trees prefer slightly acidic soil or a pH of 6.1 to 6.9)
What increases soil pH? Lime can be added to acid soils to increase soil pH. Lime not only replaces hydrogen ions while increasing soil pH, it also provides calcium and magnesium to the soil.
What decreases soil pH? Aluminum sulfate and sulfur are commonly used to acidify soil. Easily found at garden supply centers, aluminum sulfate changes soil pH instantly as the aluminum dissolves in the soil.
What do the three numbers on fertilizer labels mean? All fertilizer labels have three bold numbers. The 1st is the nitrogen (N) content, the 2nd is the phosphate (P2O5) content, and the 3rd is the potash (K2O) content.
Fertilizers come in a multitude of combinations and types. Most popular are granular, slow-release fertilizers, which should include the components your soil test identified as deficient for optimum tree growth.
Note: Fertilizing without testing may be detrimental to your trees and shrubs. Too much nitrogen, sulfur, or magnesium may stunt tree growth and disrupt the soil’s biodiversity.
Tip: If you aren’t sure about which laboratory to send your soil sample(s), ask your local ISA certified arborist to have the soil tested for you or ask a nearby nursery which one(s) they use.
6. Remove Weeds from Your Landscape
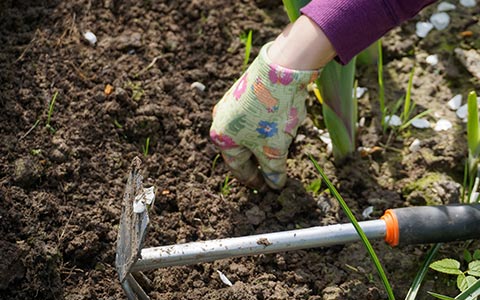
While there are dozens of chemical herbicides promising miraculous weed control results, you run the risk of causing damage to or outright killing your plants, shrubs, and trees. Consider the following removal methods:
Stop digging! – Weed seeds are practically everywhere, but only seeds at the top of soil get the right conditions to trigger germination. Digging and cultivating activities elevate buried weed seeds to the surface. Dig only when needed and immediately fill the disturbed area with plants or mulch.
Mulch – Mulch regulates soil temperature and deprives weeds of sunlight. Organic mulches can host crickets and carabid beetles, which consume weed seeds.
Deadheading – Cutting back the tops of perennial weeds reduces reseeding and forces them to use up their nutrients. No matter how you choose to deadhead your weeds, chopping them down before they seed will help you keep them from spreading.
Water your plants, not your weeds – Deprive weeds of water by placing drip or soaker hoses underneath the mulch. This method efficiently irrigates plants and leaves nearby weeds dry. Water depriving weeds can reduce weed-seed germination by up to 70 percent.
Pull them out – After rain or a deep watering, get your gloves, a kneeling pad, and a weed disposal container. Use a fishtail weeder or an old salad fork to pry up tap-root weeds, like dandelion, thistle, and dock. During dry conditions, weeds sliced off just below the soil line will die. If your weeder is too large or wide, use an old steak knife to sever their roots, then fill in any open spaces left in your mulch.
Note: Keeping your soil’s biodiversity healthy and maintaining a minimum of 3-inches of organic mulch year round will naturally deter weed growth.
7. Plant New Trees
Early spring is a great time to plant a tree. Both evergreens and deciduous trees will be coming into their growing season and have the time to “harden” new growth before the arrival of the next winter season. Observe the following:
• Determine the proper tree species by your USDA hardiness zone map
• Determine which species is the right tree in the right location
• Have the soil tested and adjusted to the species preferences
• Plant your tree
• Care for your tree
Read this beginners guide to tree planting to learn more about the process and considerations.
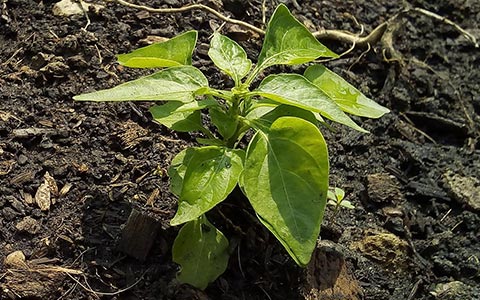
Spring Trees
In this article, you discovered seven pro tips to guide you through your tree preparation for the coming growing season.
With just a little knowledge about tree care and easy-to-follow tips, you can all but guarantee a healthy and robust growing season.
Ignoring the basic necessities of your trees will lead to their disease, infestation, decline, and eventual death. Allowing your trees to die in this manner invites the potential for cataclysmic property damage and personal injury when they fall.
Sources:
esf.edu/pubprog/brochure/soilph/soilph.htm
extension.umn.edu/planting-and-growing-guides/watering-established-trees-and-shrubs
extension.umd.edu/hgic/topics/fertilizing-trees-and-shrubs
hgic.clemson.edu/factsheet/changing-the-ph-of-your-soil/
extension.purdue.edu/extmedia/fnr/fnr-506-w.pdf
Notice: Undefined variable: page in /home/vrxdg1855sn3/public_html/wp-content/themes/72tree/content.php on line 15
Notice: Trying to get property 'ID' of non-object in /home/vrxdg1855sn3/public_html/wp-content/themes/72tree/content.php on line 15
A Beginners Guide to Tree Planting
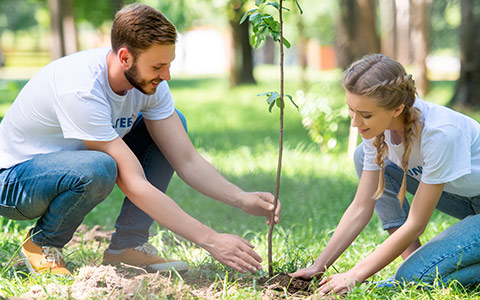
Your tree is more likely to die if you don’t consider the factors that affect its development during their planting. Your trees’ health is directly correlated to the time, location, pre-planning, and species that you choose ever before planting.
72tree.com assembled the following guide with professional tips to help you properly plant and care for your tree.
Best Time to Plant Trees
There is much debate as to when the best tree planting time is. For more moderate climates such as the south, southeast, or southwest, either early fall or early spring are appropriate planting times.
For locations where there is winter snow cover or ground freeze, spring (after the ground thaws) is the best time to plant.
Tree Location
Now that you’ve decided to plant a tree and identified the best time, you’ll need to choose a suitable location. In doing so, take the following factors into consideration:
Sunlight – Does the planting location get full sun (all day), partial sun (morning or evening), or full shade (no sun)
Water – Most tree species require well-drained soil. If your chosen location is in a low-lying area or a depression, water may accumulate and stand, leading to root rot and other diseases.
Tip: Verify that your location is well-drained after a rainstorm or run a hose at the site to see how the water accumulates or runs off.
Soil – The soil where you plant your tree should be loose, mixed with organic material, and turned to avoid compaction.
Tip: Many tree species can thrive in a soil pH level between 5 (acidic) and 7(neutral). You can raise the soil pH by adding lime or limestone and reduce the pH by adding aluminum sulfate, sulfur, manure, or compost (pH levels above 7 are alkaline).
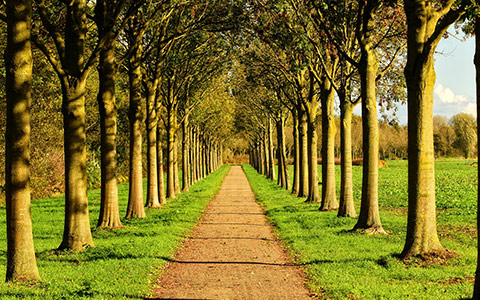
Spacing – When planting multiple trees, they can be spaced apart according to their mature canopy spread. Tree spacings from 20 to 60 feet apart are standard. This spacing allows the open-grown form of the tree canopy to develop naturally.
Conversely, when planted too close together, a tree may fail to reach its mature height and struggle to absorb enough sunlight and nutrients to remain healthy.
Tip: Follow spacing recommendations for your specific tree species.
Wind – The location you’ve selected should be observed over time to determine whether or not your tree will endure constant wind or violent wind gusts.
Tip: Stake young trees until they can support themselves without bending under pressure. Most trees will take one to two years before fully establishing their root systems.
Structures – A tree’s roots spread far from where it is planted. As roots spread, they thicken and may become invasive. When a tree is planted too close to a house, sidewalk, patio, or driveway, those roots can grow underneath the structure and break up or buckle the concrete.
Tip: Plant trees far from structures with concrete foundations or slabs, and install root barriers to protect building foundations, driveways, sidewalks, etc.
Protection – Weather and wildlife can stress or kill your tree as it matures. By planting shrubs near and around your tree, you can naturally lessen the impact of wind. Surrounding structures will also act in this capacity.
Tip: Discourage wildlife from grazing your tree’s foliage or damaging its bark by putting up chicken wire around the tree, using bark wraps, or by using chemical deterrents.
The USDA Plant Hardiness Zone Map defines planting zones from 1a to 13b. The zone in which you plan to plant a tree will determine which species you should select. You can determine your hardiness zone at planthardiness.ars.usda.gov/PHZMWeb/InteractiveMap.aspx
Tree Species
The species of tree you decide to plant can profoundly impact the surrounding landscape in various ways. Verify that the species you intend to plant is appropriate for the location in which you are planting and consider the following:
Deciduous or Evergreen Trees – If you want your tree to maintain a lush green appearance year-round, you are looking for an evergreen species which may include:
• Blue Spruce
• Scots Pine
• Green Giant Arborvitae
• Magnolia
• Holly
• Leyland Cypress
If you want to enjoy fall colors as your tree prepares to go dormant for the winter, you are looking for one of the many deciduous species which may include:
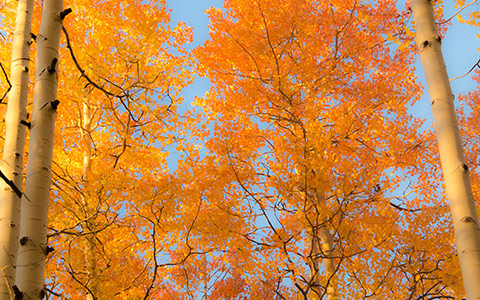
• Oaks
• Maples
• Birch
• Sweetgum
• Tulip
• Quaking Aspen
Tip: Regarding quaking aspens, the species has an invasive root system and will produce suckers that are clones of the original tree. When planting this species, be sure that it has enough space to grow and spread without obstruction.
Understory or Overstory – An understory tree may be best if your planting location is restricted or you desire a mid-sized tree. The following species are considered understory, and are shade tolerant reaching mature heights of 20 to 40 feet:
• Flowering Dogwood
• Eastern Redbud
• White Fringetree
• Japanese Maple
• Black Aldar
If you are looking for a tree that makes a statement by its size and you have the landscape to accommodate its growth, the following overstory species reach mature heights of 60 to over 100 feet:
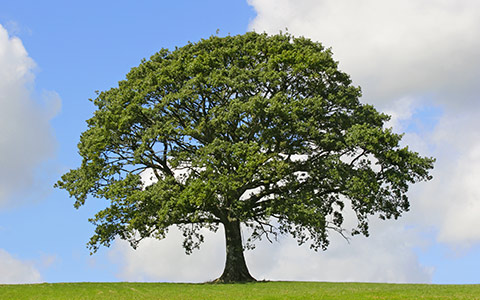
• Southern Magnolia
• Green Ash
• White Oak
• Southern Red Oak
Tip: When planting multiple trees, understory trees can be planted near overstory trees as protection from strong or persistent winds.
For more info, refer to 72tree.com/tree-buying-tips/ before purchasing the trees you intend to plant.
Planting Your Tree
When planting a seedling or sapling, the following should be considered in the preparation of the planting location:
Surrounding Soil – Organic material or pH stabilizing material should be mixed into the soil in no less than a 2-foot radius of where the tree will be planted.
Tip: When transplanting a more developed tree, treat the soil in a 3 to 4-foot radius of the planting location.
Dig the Hole – Measure the distance from the bottom of the trunk to the bottom of the roots or root ball; this is how deep your hole must be. The hole must also be wide enough for the entire root ball to fit without being cramped or bent.
Tip: To confirm the accuracy of the depth, allow the tree to rest in the hole paying particular attention to where the roots connect to the tree. Known as the root flare, it should remain just above the ground.
Water in the Hole – Before planting your tree, provide a deep watering for the hole, allowing water to soak deep into the earth below. This moisture will encourage roots to grow deep.
Plant the Tree – Now that your hole is dug, the soil enriched, and the ground watered, place your tree in the hole covering the roots with soil up to the root flare.
Tip: When covering the roots with soil, do not overly compact it. Water the newly planted tree and allow the soil to settle. As the soil settles, add more to the top, keeping the root flare just above ground level.
Watering – Your newly planted tree should receive a deep watering 2 to 3 times per week. Avoid shallow waterings as they encourage roots to grow to the surface.
Tip: Use a slow-release watering system which maintains constant moisture while allowing proper drainage for excess water.
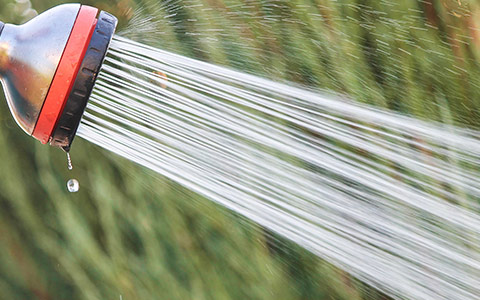
During rainy seasons, scale back the watering schedule and increase it during periods of drought. Don’t allow the soil to dry out for newly planted trees completely.
Fertilizer – If you have prepared the soil in and around the planting location, no fertilizing should be necessary for the first full year of growth.
Tip: Use organic mulch around the tree. As it decays, mulch releases nutrients into the soil. An added advantage is that mulch helps the soil retain moisture and warmth, both of which are fundamental for healthy root growth.
Tree Planting and Your Landscape
Your tree is likely to struggle and die without considering the factors that influence its growth when it is planted.
In this article, you discovered how to determine the correct tree species for your landscape, how to prepare the planting location, and pro tips to help you avoid common mistakes when planting a tree.
Your lack of knowledge about soil, sun, water, location, and species when planting a tree can result in its declining health and eventual death.
Sources:
extension.umn.edu/planting-and-growing-guides/watering-newly-planted-trees-and-shrubs
static.colostate.edu/client-files/csfs/pdfs/TreePlanting_636.pdf
extension.umn.edu/trees-and-shrubs/choosing-evergreens-your-landscape
Notice: Undefined variable: page in /home/vrxdg1855sn3/public_html/wp-content/themes/72tree/content.php on line 15
Notice: Trying to get property 'ID' of non-object in /home/vrxdg1855sn3/public_html/wp-content/themes/72tree/content.php on line 15
Tree Planting Guide
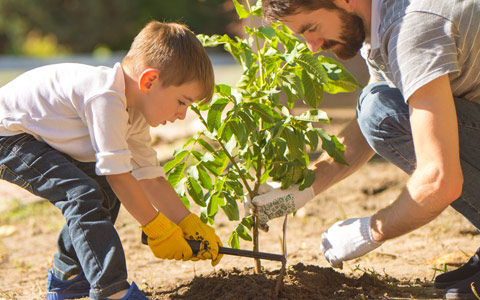
If you could make a significant contribution to the slowing of climate change and global warming, would you do it? With every tree you plant, you increase breathable air, reduce atmospheric CO2, and help the local ecosystem.
Planting a tree is the beginning of a journey with nature. The better the conditions are when planting a tree, the healthier it will be and faster it will grow.
72tree.com gathered the following hardiness zone, location, soil, watering, pruning, and care information to serve as a guide when planting a tree.
Tree Planting – Hardiness Zone
Tree species across the world have adapted to thrive in their respective environment. In the United States, the USDA has determined 11 hardiness zones by their average annual extreme low temperatures.
Before choosing a species to plant, you must first determine which hardiness zone the planting location is in. The following is the USDA’s Hardiness Zone Map.
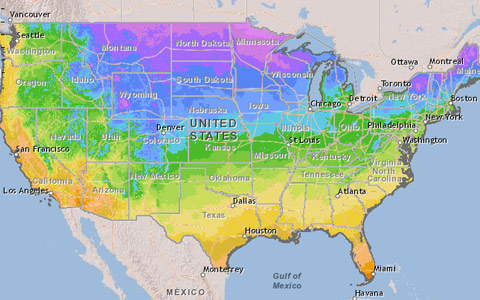
For an interactive version of the map, visit planthardiness.ars.usda.gov/phzmweb/interactivemap.aspx
As an example, the state of Georgia spans through hardiness zones 6b through 8b, making it suitable for maples, oaks, and poplars among others. For these and other shade trees suitable to plant in Alpharetta or Roswell Ga, visit 72tree.com/5-popular-alpharetta-ga-shade-trees/
Once you have determined the hardiness zone of the planting location, it’s time to consider the planting location and select a tree species.
Tree Planting – Location
While trees are impacted largely by climate, conditions within their immediate environment are equally as important. Take the following factors into consideration when choosing which species and where to plant:
Shade Tolerance – Each tree species may react differently to the amount of sunlight it is subjected to daily. Here are the shade tolerance categories:
• Shade Tolerant
• Intermediate Shade Tolerant
• Shade Intolerant
It is important to note that shade intolerant trees like poplars, eucalyptus, aspen, and pecan trees may self-prune (drop entire branches) if subject to partial or full shade environments.
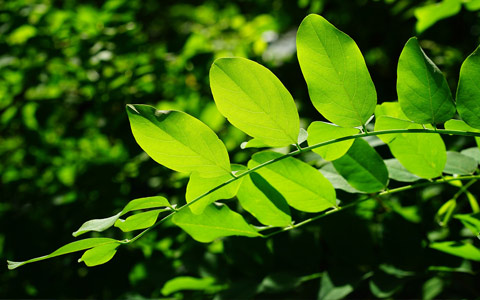
Wind Resistance – High winds and severe weather will test a tree’s foothold and its elasticity. Planting trees around the following wind-blocking features may help them survive the strongest of winds:
• Fences
• Shrubs
• Raised Garden Beds
• Hills
• Sheds
• Buildings
A tree’s resistance to severe weather is also determined by its overall health and seasonal pruning practices. Crown thinning is the perfect example of a pruning technique that allows wind to blow more freely through the crown, significantly reducing the potential for severe damage.
Understory Trees – These trees grow from 20 to 25ft tall and are shade tolerant. These trees are well suited for “plaza” settings or environments in which they are surrounded by buildings and a mostly shaded setting. In a forest, these are the trees that grow between the forest floor and the bottom of the overstory canopy.
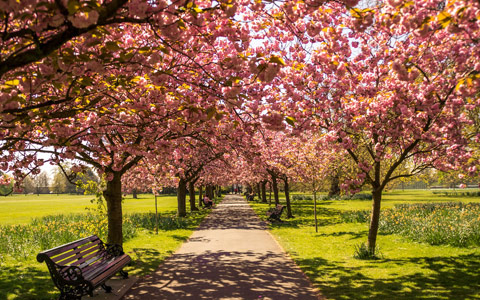
Overstory Trees – These trees grow from 40ft and beyond. Overstory trees are shade intolerant and require wide open space to reach their maximum height potential. In a forest, these are the trees that make up the uppermost part of the canopy.
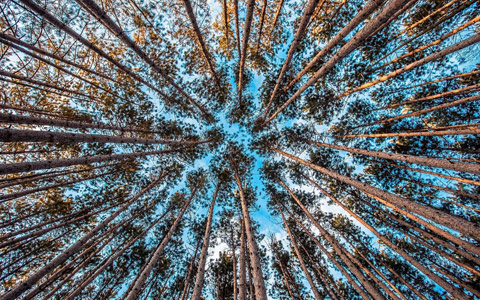
Root Growth – In nearly all tree species, some roots grow deep into the ground to stabilize the tree, and the vast majority of roots spread out around the tree within the top 2 to 3ft of soil in search of water and nutrients.
It is essential that your planting location be far enough away from sidewalks, pathways, driveways, and building foundations to avoid buckling and structural damage.
For more information on how tree roots affect surrounding structures, read 72tree.com/tree-roots-buckling-concrete-driveway/
Tree Planting – Soil
Since soil contains the organic matter and water a tree needs, it is obvious that the growth and health of your new tree depend heavily on the soil it is planted in. The following guidelines will help you prepare the soil for planting:
Soil Type – There are four basic types of soil:
• Sand – Sandy soil has difficulty retaining water and roots are often unable to establish themselves firmly.
• Silt – Silt is a granular quartz or feldspar material sized between sand and clay.
• Clay – Clay soil is the denser of the soil types, has poor drainage, and compacts very easily.
• Loam – Loam is a combination of the other three soil types and is widely considered to be the best soil for planting.
The majority of tree species flourish in well-drained silt or loam soil, while few are adapted to sand or clay soils.
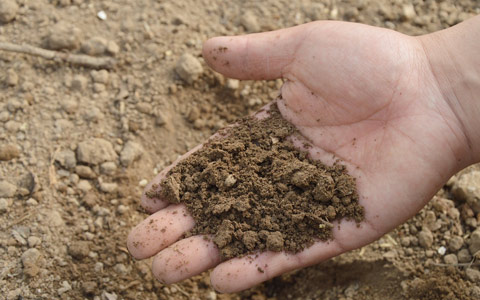
Soil pH Level – Neutral soils have a pH level of 6.5 to 7.5, acidic soils have a pH level below 6.5, and basic soils have a pH level higher than 7.5.
Depending on the species of your tree, it may grow better in acidic soil like pine trees, while most hardwoods do better in slightly acidic to neutral soil.
The pH level of the soil can be lowered by mixing in sulfur, and most fertilizers, while lime or organic mulch, can be added to raise the pH level.
When planting a tree, the soil within a 4 to 5ft radius around the trunk should have its pH adjusted to meet the needs of the tree species, and the soil mixed to a loam consistency to offer the best root development environment.
Tree Planting – Watering
For the first few years of growth, newly planted trees (in well-drained soil) require a deep watering every two weeks or so. Deep watering is when you allow a slow but steady stream of water to penetrate 10in or more into the soil.
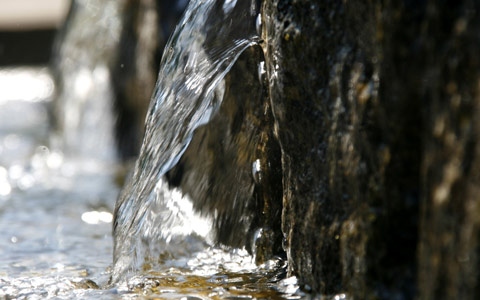
The benefit of deep watering is that roots will grow deeper into the soil, discouraging surface roots. Surface roots are easily damaged, allowing for either infection or infestation which weaken the tree’s health and could lead to its early death.
During rainy seasons, deep waterings should be spread further apart, every 3 to 4 weeks, and during dry seasons or times of drought, weekly deep waterings may be necessary.
Tree Care After Planting
After a full year of growth, it’s time to start applying routine tree care practices. In late fall, you can prune your tree to encourage spring growth, maintain its shape, or remove diseased or damaged limbs. Learn the various tree pruning techniques and their purpose so you avoid making an irreparable mistake.
Fertilizing should only occur between the beginning of spring and the beginning of summer. Fertilizing in mid or late summer will encourage new growth which will not have sufficient time to harden and will likely die in the winter months.
Set up an annual inspection with an ISA certified arborist. An arborist can give you valuable insight as to the influence your landscape has on your tree and vice-versa. He or she can also help in the early detection of disease, infestations, and other potential threats to your tree.
Tree Planting for a Better World
You can help slow the effects of climate change and global warming by planting a tree. With a world population of nearly 8 billion people, research shows that the 3 trillion trees currently occupying the planet with us just won’t be enough for human life to flourish in the coming centuries.
In this article, you discovered the USDA’s Hardiness Zone Map, tree planting guidelines for location selection, soil composition, watering frequencies, pruning, and care.
By neglecting the world’s diminishing tree population, we as a people are potentially condemning future generations to an inhospitable planet in which little – if any – life will be able to survive. When you plant and care for a tree, you are truly helping to save the planet and the future of mankind.
Sources:
http://www.americaslongleaf.org/media/2516/soil-ph-tree-suitability-in-the-south-_sref_.pdf
https://extension.psu.edu/forest-landowners-guide-to-tree-planting-success
https://csfs.colostate.edu/colorado-trees/selecting-planting-and-caring-for-trees/planting-tips/
https://forestry.usu.edu/trees-cities-towns/urban-forestry/landscape-trees-climate
https://www.extension.iastate.edu/forestry/publications/pdf_files/ctspsoilstrees.pdf
Notice: Undefined variable: page in /home/vrxdg1855sn3/public_html/wp-content/themes/72tree/content.php on line 15
Notice: Trying to get property 'ID' of non-object in /home/vrxdg1855sn3/public_html/wp-content/themes/72tree/content.php on line 15
Pomegranate Tree Information, Questions and Answers
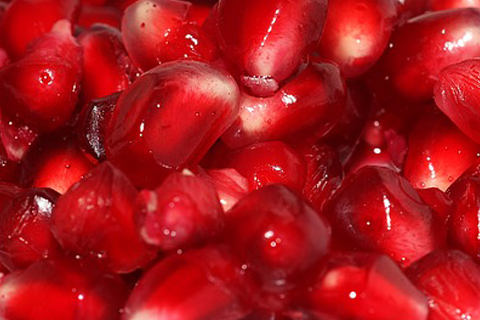
One of the healthiest fruits you can consume comes from the Punica granatum (pomegranate) tree. But how much do you really know about this amazing tree species?
Pomegranate trees produce the incredible pomegranate fruit and have been cultivated for several millennia. Relatively easy to care for, this tree, its flower, and fruit all have profound historical and cultural significance.
www.72tree.com gathered pomegranate tree information and history, care tips, and answers several frequently asked questions.
Pomegranate Tree Information
Pomegranate is a tree species native to the region of Iran to Afghanistan and Pakistan to Northern India. Today, the species is cultivated throughout the Middle East, Northern and Tropical Africa, Asia, the Mediterranean Basin, and parts of the Southwestern United States.
Tree Name – Pomegranate
Scientific Name/Species – Punica granatum
Family – Lythraceae
Genus – Punica
Nickname – Winter Jewels, Red Ruby, and Chinese Apple
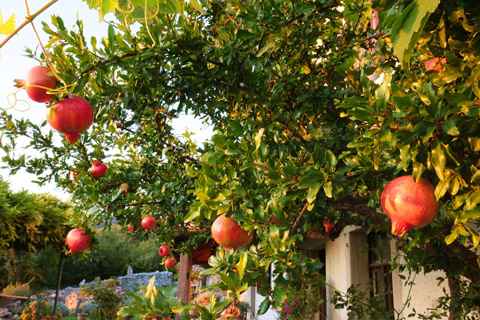
Lifespan – Can live up to 200 years or more when planted in optimal conditions.
Type – Deciduous.
Hardiness Zone(s) – from 8a to 13a
Soil Requirements – Versatile, prefers well-drained rich, fertile soil with full sun exposure.
Planting Spacing – 5 to 6ft
Watering Requirements – Regular when young or planted. Minimal thereafter.
Height – 15ft on average. Can reach 30ft under optimal conditions.
DBH – NA
Crown Span – 8 to 10ft or more at maturity.
Root Spread – Wide and shallow (10-25ft from the trunk and 2 to 3ft deep)
Uses in Landscaping – Highlight tree, border or division, and addition to orchards.
Winter/Fall Colors – Yellow before leaf-drop in the fall.
Pests – Healthy pomegranates are incredibly resilient to insect attacks but may see aphids, whiteflies, mealybugs, and thrips in the spring and summer months. Neem oil or other organic insecticides can be used to control them easily.
Disease – Keeping your pomegranate tree healthy will help it avoid or fight rot, anthracnose, and fungal wilt.
Major Disease Threat – Heart Rot
Pomegranate Origin and History
Originating from Iran to the Himalayas in northern India, Punica granatum (pomegranate) has been grown for several millennia, and was cultivated and naturalized over the extent of the Mediterranean region.
It wasn’t until 1769 that Spanish settlers introduced the first pomegranate specimen to California. Two and a half centuries later, pomegranate trees can be found throughout the US in a commercial capacity as well as in private landscapes and potted in our homes.
Armenian culture sees the pomegranate as a semi-religious icon. A symbol representing abundance, marriage, and fertility, the fruit and its juice are used with Armenian food, heritage, and wine.

As the fruit contains numerous seeds, it is perceived to symbolize fruitfulness. Thus, fostering the tradition to eat the fruit on Rosh Hashana. Besides several mentions in the Bible, some believe the fruit has 613 seeds corresponding to the 613 commandments found in the Torah.
Care Tips for Pomegranate Trees
Pomegranate trees do not require much attention. They are very adaptable to their environment and remarkably resilient to infestation and illness when healthy.
The following tips will assist you in keeping your pomegranate tree(s) healthy and thriving.
Planting Location and Soil – Pomegranates will adapt to nearly any well-drained soil condition regardless of its pH. As long as your specimen receives full sun and is protected from temperatures below 40 degrees Fahrenheit, it should thrive.
Watering – Pomegranate roots grow within the first 2 to 3 feet of soil and do not require deep watering. Keep the soil moist for the first 8 months to 1 year, and again when the tree is bearing fruit.
Once the tree’s roots are established, you can cut back to 2 waterings per month in the drier months. By this time though, your tree will be able to tolerate drought conditions.
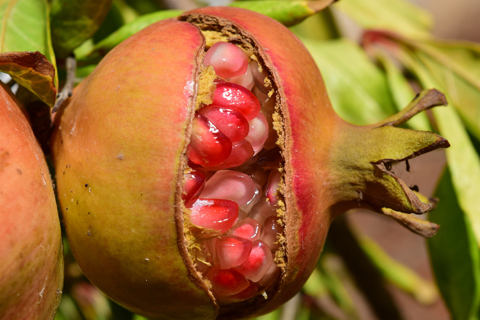
When the tree is bearing fruit, you can prevent the fruit from splitting by keeping the soil moist.
Fertilizer – After planting a pomegranate tree, you do not need to fertilize it for a full year. The use of organic mulch (manure or compost) will suffice.
Thereafter, each spring, you can apply 2 ounces of nitrogen granules. Increase the dose 1 ounce for each subsequent year.
There are fertilizers specially formulated for fruit trees which may be used as well.
Pruning – Pomegranate trees produce flowers on new growth and can be pruned to remove damaged or dying branches, to shape the tree, or to remove suckers, dead wood, and unwanted growth.
The best time to prune your tree is late winter or early spring before the buds break, and when the threat of frost has subsided.
Be cautious of over-pruning, as it will reduce the amount of fruit your tree is able to produce.
Frequently Asked Questions
Question: Do All Pomegranates Have 613 Seeds?
Answer: No. While some will debate that all pomegranates have this number of seeds, it would be quite easy to prove the contrary.
Question: What Are Pomegranate Seeds Called?
Answer: Arils.
Question: Are Pomegranates Anti-Inflammatory?
Answer: Studies show that pomegranates have excellent anti-inflammatory properties.
Question: What Vitamins Are in Pomegranate Seeds?
Answer: Pomegranates have B vitamins including folate, vitamin C, vitamin K, and potassium.
Question: Are Pomegranates an Antioxidant?
Answer: They have high contents of polyphenols and are renowned for their antioxidant capabilities.
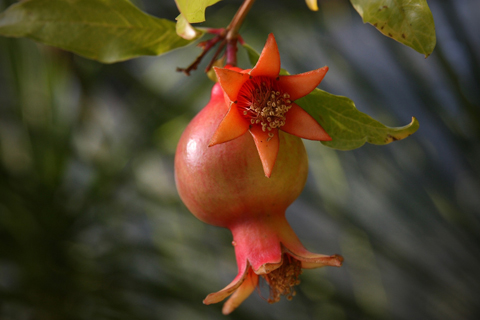
Question: How Long Does It Take for Pomegranate to Fruit?
Answer: Pomegranate trees can take up to 7 months for their fruit to fully mature. The tree itself will only bear fruit after two to three years of hearty growth.
Question: When Do Pomegranate Fruits Ripen?
Answer: Pomegranate fruit in the northern hemisphere typically ripens from September to February, and from March to May in the southern hemisphere.
Pomegranate Trees and Fruit for Your Landscape and Health
Cultivated for thousands of years, the pomegranate tree and its fruit have been gracing landscapes and providing powerful antioxidants through vitamin-rich seeds for generation after generation.
In this article, you discovered the history of the pomegranate tree, how to care for them, and the answers to many common questions about the species.
Growing a pomegranate tree is easy when compared to other fruit trees, and should be a part of your landscape. With a little patience and care, you could have ripening pomegranates in under three years.
Sources:
https://www.science.gov/topicpages/t/total+pomegranate+tannin
https://www.crfg.org/pubs/ff/pomegranate.html
https://hgic.clemson.edu/factsheet/pomegranate/
Notice: Undefined variable: page in /home/vrxdg1855sn3/public_html/wp-content/themes/72tree/content.php on line 15
Notice: Trying to get property 'ID' of non-object in /home/vrxdg1855sn3/public_html/wp-content/themes/72tree/content.php on line 15
Crape Myrtle – A Southern Tree for Your Alpharetta and Roswell Yard
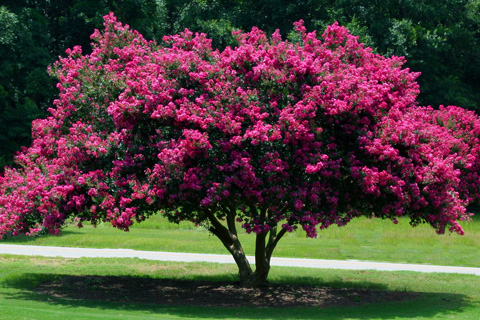
Lagerstroemia, known as crepe myrtle or crape myrtle is a tree that thrives in US Hardiness zones 7 through 10, making it a perfect choice for your Alpharetta or Roswell yard. The genus came to the US over 200 years ago and got its name from the Swedish merchant Magnus von Lagerstrom.
The most popular species is L. indica. It is a native of southern China and Thailand. For centuries, crepe myrtles have been grown in Asia as ornamentals.
Of all the southern trees and plants, crepe myrtles are among the most desired for their outstanding summer display of blooms and their brilliant fall colors. 72 Tree, Seed & Land Co. prepared an extensive article covering the characteristics, environment, and care these trees need to flourish and light up your landscape.
Are Crepe Myrtles Trees or Bushes
The Lagerstroemia genus contains approximately 50 species of trees and shrubs both deciduous and evergreen. So, this species can indeed grow as a tree or shrub, making it ideal for hedges, container planting, or even in groupings along your landscape.
Height – The L. indica species possesses cultivars and hybrids that remain under 5ft in height, some that reach 11 to 15ft in height, and those that tower over the others, reaching heights of 20 to 30ft.
Canopy – At maturity, the canopy can reach from 6ft to well beyond 15ft depending on the species.
Trunk – Crape Myrtles are known to have multiple trunks with beautiful bark which exfoliates in the winter months. Be cautious when pruning or working around these trees, their wood is somewhat brittle, and the trunks may easily crack when put under pressure.
Lifespan – When planted in full sun and fertile soil, Crepe Myrtles can live well beyond 50 years. In fact, dotted along the southeastern landscape, it is common to come across specimens over 100 years old.
Uses – Depending on the species, these trees work as shrubs, hedges, container plants, landscape groupings, and in some cities as street trees.
If you decided you prefer to plant an evergreen instead, visit 72tree.com/3-evergreen-species-alpharetta-roswell-yard/ for some great candidates.
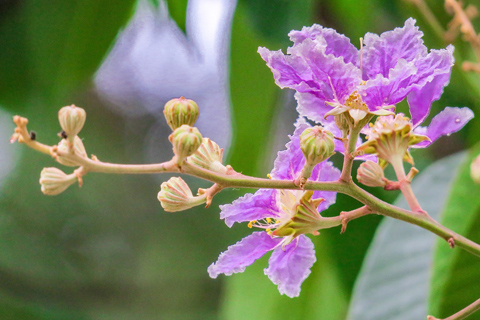
Crepe Myrtle Tree Care
About two years after planting, these species become very tolerant to drought, heat, humidity, and will do well in nearly any well-drained soil. They become robust enough to resprout even after being completely frozen.
Crepe myrtles are low maintenance. However, you still need to do some planning before planting and a bit of upkeep as they grow.
Planting – Location is critical when planting crepe myrtles. Select a spot that has well-drained soil and gets full sun. Planting in partial or full shade will significantly reduce its ability to flower and may reduce its lifespan as well.
Crepe myrtles have a shallow and very fibrous root system which can extend 3 to 4 times the diameter of the canopy. As with all trees, the planting location should be at least 5 to 10 feet away from cement pathways, foundations, and sidewalks.
Pruning – Very little pruning is required. Improper pruning disrupts the development of a robust branching system and will leave your specimen deformed and vulnerable to weather, pests, and fungi.
If there is a need to prune, it should occur in late winter or early spring to correct the following:
• Removing crossed or rubbing branches.
• Removing suckers from the base.
• Branches growing inward (toward the center).
• Canopy thinning for better air circulation.
• Gradually remove side branches up to 4 or 5 feet as the tree grows.
• Reducing multi-trunk trees to a single trunk (not recommended).
Summer pruning can include:
• Removing old seed pods and spent flowers (removing them after the first bloom encourages further blooming).
• Removing small twig-like growth.
All crepe myrtle species bloom on new wood. The proper and minimal pruning of your tree will encourage this growth and promote a beautiful summer blooming season.
If you are pruning your tree because it has gotten too large for its location, you’ve planted the wrong species.
Watering – Provide newly planted crepe myrtles with a deep and thorough watering. Then, water your tree up to 4 or 5 times per week during hot weather or when planted in sandy soil. When the tree is dormant or during cold weather, your tree will need watering once per week.
Blooms – As previously mentioned, all crepe myrtles bloom on new wood. After the first bloom, removing the spent flowers will encourage further blooming in the season.
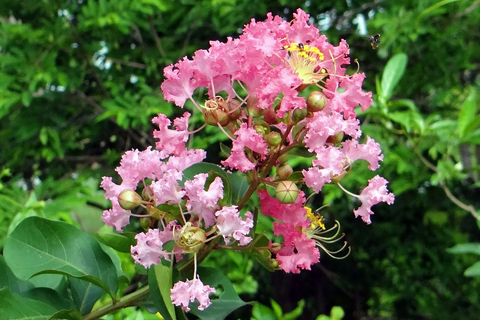
Tree Pests and Disease That Attack Crepe Myrtles
These trees like all others on your landscape are susceptible to infestations, disease, and animal damage. The best defense against these threats is to keep your tree(s) healthy, plant, prune, and water them properly and they will be less likely to suffer damage from the following:
Pests that infest crepe myrtles:
Japanese Beetle – This insect is approximately 1/2 inch in length, its body is oval and metallic green, and its wings are copper in color.
Larvae remain underground where they consume grass and young tree roots. Adult beetles feed on the tissues of the leaves and are most active on trees in full sun during the warmest part of the day.
A Japanese beetle infestation can cause severe damage to all of the trees on your landscape. Traps, pyrethrins, and neem oil can help curtail a beetle outbreak. However, this is an urgent situation which needs to be evaluated by a certified arborist.
Crape Myrtle Aphid – These insects are yellowish-green and have black spots on their abdomen. They measure from a sixteenth to an eighth of an inch in length.
Both nymphs and adults feed on the underside of the foliage causing it to droop and yellow leaf spots to appear. Buds, flowers, and branch tips can all be damaged as well from their feeding.
Sooty mold will appear on the leaves when there is an aphid infestation. This mold is a byproduct of the aphid’s excrement and will disappear once the outbreak ends.
Watch this video to learn how to eliminate aphids and “black” sooty mold on your crape myrtle.
When a crape myrtle aphid infestation occurs, apply a 2oz. to 1 gallon solution of molasses and water to the affected areas and release ladybugs around the tree. Neem oil is also very useful in controlling aphids.
Fungi that attack crepe myrtles:
Powdery Mildew – This fungus appears as a white powdery substance and can spread very quickly if not handled properly.
It is worth noting that trees planted in full sun are not typically bothered by this fungus.
To control powdery mildew, spray a fungicide on the affected area and its surroundings.
Sooty Mold – This mold has a tar-like appearance and is a result an aphid infestation (see above).
Bark Shedding – Don’t be alarmed. While it may seem that something has infected your tree, there is nothing wrong with it. Crepe myrtles, once reaching adulthood will naturally exfoliate their bark in winter months, revealing the magnificent color variations of its trunk.
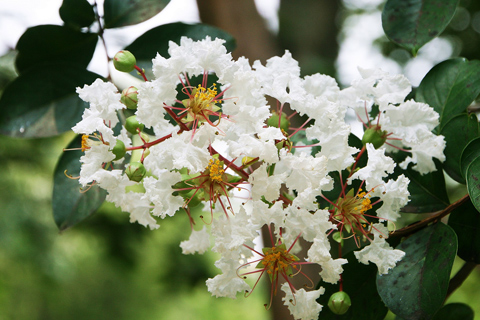
Crepe Myrtles and Summer Blooms
If you are looking for an incredible addition to your Alpharetta yard or landscape, crepe myrtles are a must have. Besides being low maintenance, they will put on a colorful show every summer.
An added plus in the summer is when the blooms attract birds seeking refuge and nesting and offer their nectar and pollen to the bees.
Sources:
https://en.wikipedia.org/wiki/Lagerstroemia
https://www.leugardens.org/wp-content/uploads/2014/07/Crepe_myrtles.pdf
https://crapemyrtletrails.org/crape-myrtle-history/
http://www.pcmg-texas.org/images/trees/crape_myrtle_pest.pdf
https://crapemyrtletrails.org/pest-control/
